Working with the Local Filesystem in Google Chrome

With the rise of dynamic JavaScript web applications have come a plethora of browser standards that make building rich web applications possible and make the user experience more streamlined. One of the standards still largely in its infancy is the file system access API currently implemented by Google Chrome. The FileSystem API has been a way to read and write to files inside a browser, but it doesn't permit the user to read and write to files they select via a native file picker. This is exactly what the File System Access API solves. Although it is only available in Google Chrome as of now, this API solves a plethora of problems that come when building editor web applications. For example, I recently have been working on Pluto.jl, which is a reactive notebook editor for the Julia programming language. One of the features I am building is a way to save a user's notebook files directly to their computer using this API rather than having to first jump to an external server and save the file there instead.
Today we're going to be building an extremely basic text editor that can create, open, and edit text files from the user's local computer. We won't be using any sort of web frameworks like React, but know that all the concepts discussed here can be translated into any web framework.
Getting Started
Firstly, note that all code for this project can be found at https://github.com/ctrekker/simple-text-editor. If for any reason you want to extend or build off the code I have written during the writing of this article, feel free to clone the repository and use the code however you like.
To start this project we need two things: a new folder and a way to serve static HTML files. In this tutorial we will be using serve from the Node Package Manager, but any static file hosting service will work. If you don't already have serve installed but have npm, you can install it by running the following command:
npm install -g serveNext let's create a new folder where all our static HTML, CSS, and JavaScript files will reside. I'll call mine simple-text-editor.
mkdir simple-text-editor
cd simple-text-editor
Now that we have a separate folder, we need to make two different files. One will be called index.html. This is where the user will land when they first visit the site. The second will be called editor.html, which is where we will be putting the code for the text editor.
Now we need to create 4 more files: a script file for each HTML file and a stylesheet for both pages. I'll call the scripts index.js and editor.js, and I'll call the stylesheet style.css. We will also create a common.js script which will contain some common elements which are shared between both our index and our editor.
We'll start by adding the following to both index.html and editor.html:
<!DOCTYPE html>
<html>
    <head>
        <script src="common.js"></script>
        <script src="index.js"></script>
        <link rel="stylesheet" href="style.css"/>
    </head>
    <body id="indexBody">

    </body>
</html>
In editor.html the script being referenced is editor.js rather than index.js. Now that we have created these files, we are now ready to start working on our editor.
Opening Files
We will start by adding an open button to our main page. Keep in mind that I will be doing minimal styling, so feel free to make your version look better!
The first step is to add a button to our index.html. Now the body of this file looks like this.
<div class="root">
    <button id="fileOpen">Open File</button>
</div>
Inside our index.js we will define two functions, one to handle when the window loads and the other for handling when the button is pressed:
async function openFile(e) {
    console.log('opening file')
    const [fileHandle] = await window.showOpenFilePicker();

    const file = await fileHandle.getFile();
    const contents = await file.text();

    console.log(contents)
}

window.onload = () => {
    const openFileButton = document.getElementById("fileOpen");
    openFileButton.addEventListener('click', openFile)
}
The onload function will run once the DOM has finished loading and our elements have finished being rendered. This is where we add our event listener for when the button for opening a file is pressed. When it is pressed, openFile is called. This opens a file using the window.showOpenFilePicker function, which will cause the native file open window to appear. This is the first function from the File System Access API that we will be using. Once the user selects a file a list of file handles will be returned. We will only allow opening one file at a time, so we will just take the first file handle. From here, we can use a second API call called getFile. This will get a readable File object we can use to get its content, as we do on the next line. With file.text() we get the file contents, and on the following line we print it to the console. At this point, the user can open up a file and see its contents all within the browser! Already this has far surpassed what was previously possible within a browser. Traditionally a user would have to submit a form with a file upload to read a user's file, which takes significant amounts of code and requires a backend.
But we want to open it in the editor.html. To do this, we need to save our file handle somehow and redirect the user to editor.html. Unfortunately file handles cannot be saved in localStorage, but they can be serialized in an IndexedDB database. Inside our common.js we will create some functions that will manage our database and keep track of the files we have opened.
First we need a function inside common.js that will make sure our database is properly initialized. We will call this function db.init().
db.init = () => {
    return new Promise((resolve, reject) => {
        const request = indexedDB.open('EditorDatabase');
        request.onerror = reject;
        request.onsuccess = (e) => {
            db.idb = e.target.result;
            resolve();
        };
        request.onupgradeneeded = function(event) {
            const idb = event.target.result;

            // Create a store for recent files and their handles
            const recentStore = db.createObjectStore('recentFiles', { autoIncrement: true });
        };
    });
};
Then we need a way to save our file handle to our newly created database. This can be quite the lengthy process, so we'll make another function for it
db.save = (fileHandle) => {
    return new Promise(async (resolve, reject) => {
        if(!db.idb) {
            await db.init();
        }

        const recentEntry = {
            name: fileHandle.name,
            handle: fileHandle
        };

        const store = db.idb.transaction(['recentFiles'], 'readwrite').objectStore('recentFiles');
        const req = store.add(recentEntry);
        req.onsuccess = (e) => {
            resolve(e.target.result);
        };
        req.onerror = reject;
    });
};
Now we can modify our openFile function to save the handle rather than print it out, then send the user to the editor.html page.
async function openFile(e) {
    const [fileHandle] = await window.showOpenFilePicker();
    const key = await db.save(fileHandle);
    window.location = `editor.html#${key}`;
}
At this point we have everything we need for the editor to start making changes to these files upon user action, so on to the next section!
Editing the Files
For the sake of simplicity, our editor is going to consist of a single textarea listening for the change event. In reality you would probably want to either build your own custom editor or use a premade one like CodeMirror. When the contents of the textarea changes we will simply overwrite the contents of the file to whatever is currently in the textarea. So now move over to the editor.html file as we will be making further changes there.
The first task is to style a textarea element to take up the entire screen. This isn't too difficult, but first we have to add the element to editor.html.
<body>
    <textarea id="editor"></textarea>
</body>
Now move over to the stylesheet style.css and remove all margin and padding from both the html element and the document body.
html, body {
    margin: 0;
    padding: 0;
    height: 100%;
}
Then we need a rule for resizing the editor textarea to fill the whole screen. To do this we also need to resize the body to fill 100% of the screen as well.
#editor {
    width: calc(100% - 20px);
    height: calc(100% - 20px);
    padding: 10px;
    resize: none;
    border: 0;
}
#editor:focus {
    outline: none;
}
Now that the textarea completely fills the screen, we want to fill it with the contents of the file handle we referenced in the hash of the URL when we redirected to the editor. The URL hash is the segment starting with the # sign. In JavaScript, this can be found with window.location.hash. In my case, we will be editing the 6th file I opened, so my window hash is #6. This is the key we want to use in our IndexedDB database. To extract the 6 key, I will use the following code:
const key = parseInt(window.location.hash.substring(1))But we need a way of retrieving the file handle from our database. To do this we will define another db function inside our common.js script. Here's what the code to fetch a file handle based on its entry's key looks like:
db.get = (key) => {
    return new Promise(async (resolve, reject) => {
        if(!db.idb) {
            await db.init();
        }

        const store = db.idb.transaction(['recentFiles'], 'readwrite').objectStore('recentFiles');
        const req = store.get(key);
        req.onerror = reject;
        req.onsuccess = (e) => {
            resolve(req.result.handle);
        };
    });
};
So now we'll jump to our editor.js script and write some simple code that will automatically fill the editor textarea with the contents of the file.
window.onload = async () => {
    const editor = document.getElementById('editor');

    const fileKey = parseInt(window.location.hash.substring(1));
    const fileHandle = await db.get(fileKey);

    const file = await fileHandle.getFile();
    const contents = await file.text();

    editor.value = contents;
};
There is unfortunately a problem with this code though. Since this is the web, we have to play nicely within the sandbox. As such we first need to ask the user to initiate a request to edit the file. For this we will put an additional element inside our body: a button which requests permission to edit the file.
<body>
    <button id="requestPermissions">Request Edit Permissions</button>
    <textarea id="editor" style="display: none"></textarea>
</body>
And we will change the contents of editor.js to the following:
window.onload = async () => {
    const requestPermissions = document.getElementById('requestPermissions');
    const editor = document.getElementById('editor');

    const fileKey = parseInt(window.location.hash.substring(1));
    const fileHandle = await db.get(fileKey);

    requestPermissions.onclick = async () => {
        const writable = await fileHandle.createWritable();
        const file = await fileHandle.getFile();
        const contents = await file.text();
        editor.value = contents;

        requestPermissions.style.display = 'none';
        editor.style.display = '';
    };
};
You may have noticed how we create a writable only to never use it. I'm not sure whether this is a bug, but by only getting a file the browser never makes the request and denies access to the file. By getting a writable we force the browser to make the request, and from there we can make all the contents requests we want.
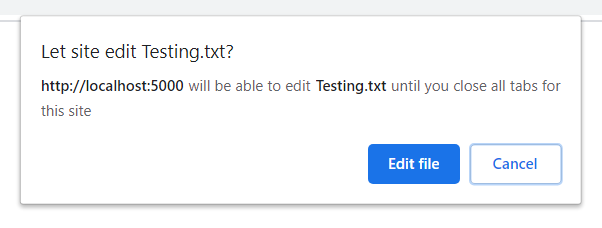
Now we get a popup that confirms that the user does indeed want to let our program modify their local files. This is rather understandable considering you don't want some website on the internet you didn't mean to go to installing some sort of malware on your computer.
If you press the "Edit file" button the contents of that file should appear instantly (or maybe not if you picked a large file) within the editor textarea. Now all that's left is to write a function that saves the contents of the textarea to the file, and run it each time the user types a character.
async function saveFile() {
    const writable = await fileHandle.createWritable();
    await writable.write(editor.value);
    await writable.close();
}
editor.addEventListener('keyup', saveFile);
Simply add this code at the end of the window.onload function inside editor.txt. There is still one problem with this code though - it saves the file every time the user makes a 1 character change! This isn't a problem for small files, but for larger files this simply won't work. To fix this we will utilize an idea called throttling. When you throttle a function call, you ensure it can only be called every n milliseconds. This way the file is periodically saved in response to a user making changes, but in our case only 1000 milliseconds (1 second). To do this we will make use of the setTimeout function. This waits some provided number of milliseconds before performing an action. Here's what the code looks like inside our throttling function:
let currentTimeout = null;
function throttledSaveFile() {
    if(currentTimeout === null) {
        currentTimeout = setTimeout(saveFile, 1000);
    }
}
And we will reference this function for our event listener:
editor.addEventListener('keyup', throttledSaveFile);And finally we have to set our currentTimeout back to null once it has finished so that we can schedule another save the next time the user makes a change.
async function saveFile() {
    const writable = await fileHandle.createWritable();
    await writable.write(editor.value);
    await writable.close();

    currentTimeout = null;
}
That's it for editing! Now changes will automatically be saved to the file we are editing every second if the user makes a change!
Listing Recent Files
It would be nice if on the index page there was a way to select recent files and the editor could simply open up that file instead of the user having to manually traverse through their file explorer each and every time they want to open a file. To do this we need to go back to our main index.html landing page and add a little bit more code.
Inside common.js we will create another db function that returns a list of all the recently edited files in the editor.
db.list = () => {
    return new Promise(async (resolve, reject) => {
        if(!db.idb) {
            await db.init();
        }

        const store = db.idb.transaction(['recentFiles'], 'readwrite').objectStore('recentFiles');
        const recentFiles = [];

        const cursorReq = store.openCursor();
        cursorReq.onerror = reject;
        cursorReq.onsuccess = (e) => {
            const cursor = e.target.result;
            if(cursor) {
                recentFiles.push({ key: cursor.key, ...cursor.value });
                cursor.continue();
            }
            else {
                resolve(recentFiles);
            }
        };
    });
};
If this is your first encounter with IndexedDB, you're probably thinking the same thing I was: this is far too verbose. Indeed, our common.js file has grown to be about 80 lines with really only 3 simple functions performing get, list, and set operations on our list of recent files. In this project we are hardly using IndexedDB to its full capacity though, and its verbosity comes as a result of its great power when managing larger amounts of data all on the client-side.
We will display recent files right under the open button in a separate div element containing a header labeled "Recent Files" and a bulleted list of links to our editor corresponding with each file they have edited in the past. The body of the index.html file now looks like this:
<div class="root">
    <button id="fileOpen">Open File</button>
    <div>
        <h3>Recent Files</h3>
        <ul id="recentFiles">
            <i>No recent files yet. Start by opening a file!</i>
        </ul>
    </div>
</div>
And now we can make use of the listing function we wrote in common.js inside our window.onload function. Place this code at the bottom of the index.html window.onload function.
const recentFiles = await db.list();
const recentFilesEl = document.getElementById('recentFiles');
if(recentFiles.length > 0) {
    recentFilesEl.removeChild(document.getElementsByTagName('i')[0]);
}
for(let recentFile of recentFiles) {
    const recentFileLink = document.createElement('a');
    recentFileLink.setAttribute('href', `editor#${recentFile.key}`);
    recentFileLink.innerText = recentFile.name;

    const recentFileEl = document.createElement('li');
    recentFileEl.appendChild(recentFileLink);

    recentFilesEl.appendChild(recentFileEl);
}
This code uses some magic DOM manipulation to append a list element to the end of the recent files list using document.createElement. The same thing could be done with el.innerHTML, but in general using this method is considered better practice. Ultimately for a project like this though, it doesn't matter.
At this point our end product is fully functional. We can open files, edit them, and return later with our recent files list. But look at how it looks right now...
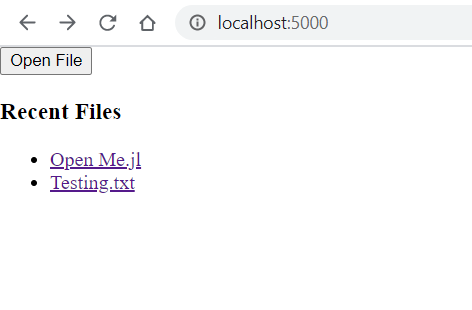
I'll be the first to admit that this is a less-than-optimal appearance for any sort of modern webpage. I'm no professional UI/UX designer, but I do know how to make things look decent enough, which is exactly what we will be doing in the next section (don't worry it's quick and easy).
Wrapping Up - Making it look presentable
First let's change the font from Times New Roman to Arial, Helvetica, or sans-serif as a last resort. All these changes will go within the styles.css file.
html, body {
    font-family: Arial, Helvetica, sans-serif;
}
Next up we make the buttons look a little more modern
button {
    background: rgba(0, 0, 0, 0.2);
    border: none;
    padding: 10px;
    transition: background 0.2s;
}
button:hover {
    background: rgba(0, 0, 0, 0.3);
}
Then we make the body of our index file have a background color and center it's children using the flexbox display.
#indexBody {
    background-color: rgba(0, 0, 0, 0.02);
    display: flex;
    align-items: center;
    justify-content: center;
}
Now all our content is centered in the page. However, it still looks rather poor in that it blends in with the background. To make it pop out, we will style the root class div element with a background color of its own and a shadow. Also the margin of the header inside root is excessive, so I put in a rule to set its bottom margin to 0.
.root {
    padding: 25px;
    background-color: white;
    box-shadow: 2px 3px 11px 4px rgba(0, 0, 0, 0.05);
}
.root h3 {
    margin-bottom: 0;
}
Finally, we will style the list of recent files and the links to the editor in a manner which will make them appear similar to the buttons.
#recentFiles {
    padding-left: 0;
    list-style-type: none;
    margin-top: 5px;
}
#recentFiles > li {
    padding: 5px;
}
#recentFiles > li > a {
    padding: 5px;
    color: black;
    text-decoration: none;
    display: block;
    transition: background 0.2s;
}
#recentFiles > li > a:hover {
    background-color: rgba(0, 0, 0, 0.05);
}
And now, after only a little bit of CSS magic, we have something that looks like this:
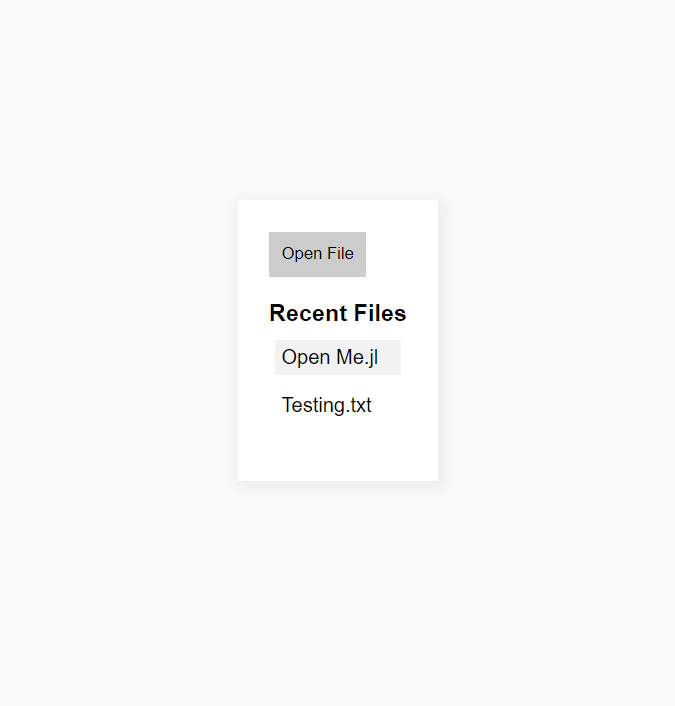
There's plenty of room for improvement in the styling, but the style obviously wasn't the main focus of this article.
Conclusion
This API is deeply exciting to me because it is further approaching the dream of making web applications capable of everything that desktop applications are. Obviously there are plenty of hurdles, but I believe that local file access is a key step toward this dream. Unfortunately this API is only implemented in the newer Chrome browsers, but it is likely that other browsers will implement this or something similar in the near future. Personally I have been working on supporting local browser saving in a web application called Pluto.jl. If you want to see a working demo of this new feature, check out this short video I made that demonstrates this API in action. I can't wait to see some of the other awesome developments in the web app space that come out of this!