How to Publish Pluto.jl Notebooks Online (with Interactivity!)

The possibilities of reactive notebooks are limitless, with applications spanning from data science to the classroom, and beyond! Pluto is a Julia package that lets you write reactive notebooks in Julia. If you've heard little of Pluto or Julia before, I would advise you to read through my guide for building reactive notebooks, as this article will assume you have at least a basic knowledge of both Julia and Pluto.
Built-In Solutions
At this point in Pluto's development, there are limited options for publication. However, Pluto does have the option to export notebooks to static webpages as an HTML document or as a PDF.

PDF files are great if you simply want to send a notebook's content to another person quickly, but we will mostly focus on converting notebooks into HTML in this guide. If you want to find out more about exporting to static PDFs, check out the PlutoExport.jl package I wrote.
Static Online Publishing
It's clear that Pluto can export notebook contents as an HTML file just fine, so why not automate this? As it turns out, a template repository on GitHub exists for doing just that! By utilizing a combination of Github Actions and Github Pages, we can publish static versions of our notebook files publically for free. To get started, all we have to do is make a new GitHub repository from this template: https://github.com/fonsp/pluto-static-render-test.
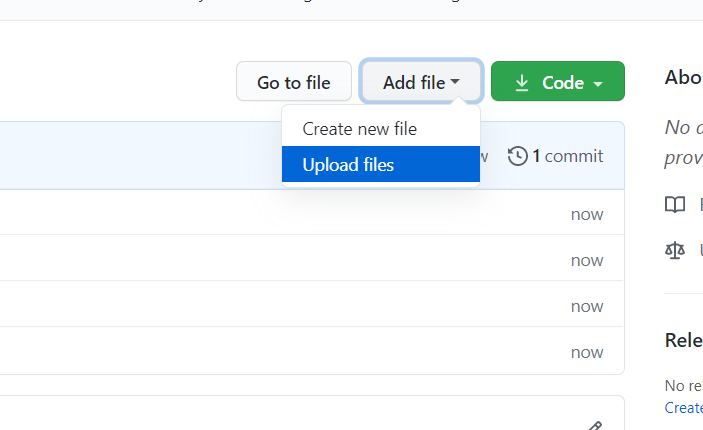
The instructions for doing so are rather straightforward and are present in that repository's readme file. Once you've made your own repository based on this template, all that's left is to add some notebook files and watch the magic happen! Either do this through the GitHub webpage or clone the repository locally and commit and push your changes.
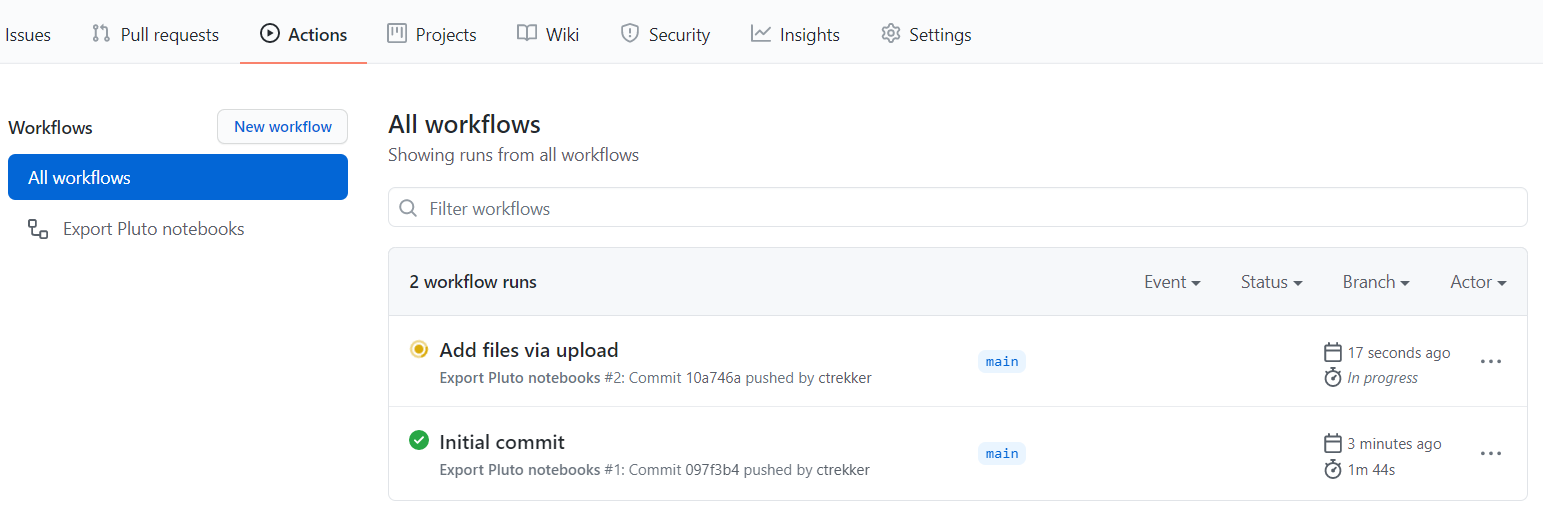
Once you upload some notebook files and commit the changes to the main branch, a GitHub action will start to export your notebook files to static HTML files in the background. If you want to check on the progress, navigate to the "Actions" tab in your repository.
After a couple of minutes the workflow run will finish, but in the meantime we have to activate GitHub Pages for this repository. If you've never used GitHub Pages before, it's a convenient service GitHub provides that enables users to host static webpages for free.
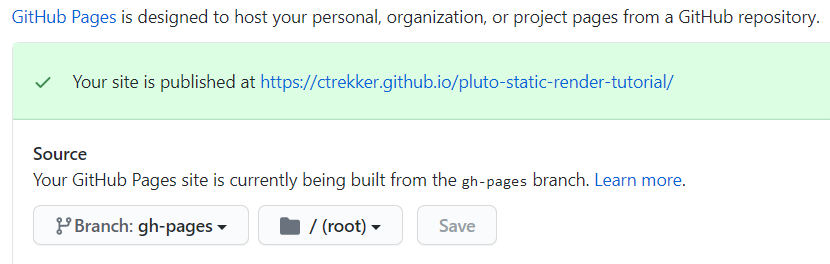
Setting it up is relatively simple, just visit the repository's settings tab and scroll to the bottom of the general settings page. Right above the "Danger Zone" section should be the "GitHub Pages" section. To activate it, change the dropdown labeled "Source" from "None" to gh-pages. This selects the branch that GitHub Pages will static host online. Don't make any changes to the root folder, and click the "Save" button on the right. After saving a link appears to your new webpage!
Even after completing these steps, it will take up to 20 minutes for the changes to appear. From the GitHub documentation:
Note: It can take up to 20 minutes for changes to your site to publish after you push the changes to GitHub. If your don't see your changes reflected in your browser after an hour, see "About Jekyll build errors for GitHub Pages sites."
This site will automatically update every time you add, remove, or change a file and push those changes to the GitHub repository. I use this type of repository regularly to post some of my favorite notebooks I've written. Using this exact process I host the contents of research.cot.llc. If you want to learn more about how to deploy GitHub Pages to a custom URL, check out this article on the GitHub Documentation site.
Adding Interactivity
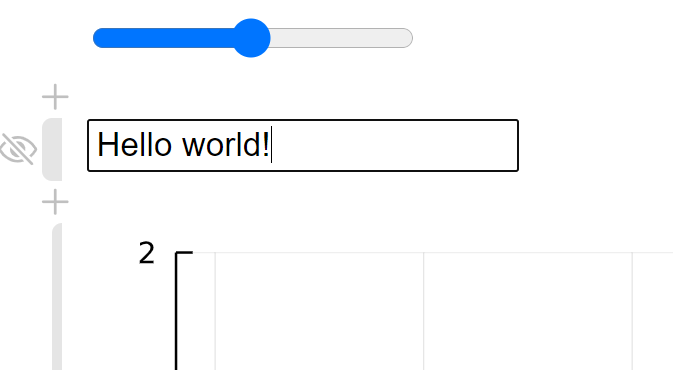
Much of the power of Pluto lies in it's interactive capabilities through @bind and it's reactive structure. Internally Pluto tracks which cells depends on which other cells, and can therefore calculate which cells need to be updated when another is updated. In short, this means one of the things we can do is publish our notebooks so users can interact with them. For example, from my guide for building reactive notebooks article, we constructed a basic notebook which looks like this:
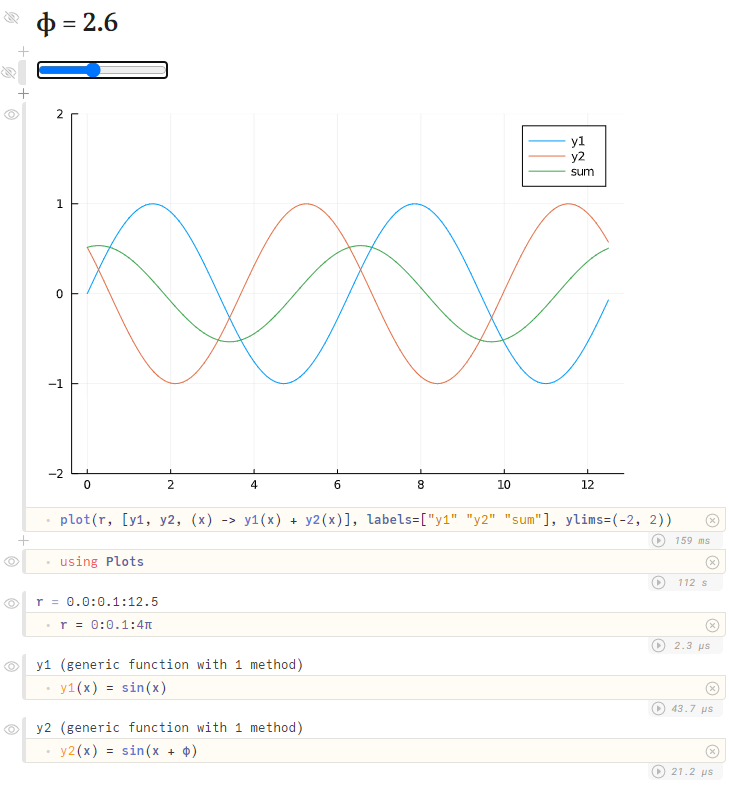
By dragging around the slider at the top, the plot interactively updates via the cell directly below it. However, when we export this notebook to a static HTML file, the slider doesn't work anymore. That's because there's no way that Julia can run (for now) in a web browser alone; we need some sort of backend to do that. Obviously while editing a notebook, that backend is the Pluto server that you run in a Julia REPL with Pluto.run(). But that backend comes with some extra functionality we don't want for publishing, such as modifying or creating notebooks.
A recent development in the Pluto world is what's referred to as a "Slider Server". Rather than providing the entire functionality of Pluto, a Slider Server just includes the parts necessary for calculating cell outputs based upon slider (or other interactive inputs) changes. Unfortunately this server must be run in a dynamic environment, such as a virtual machine or container. For this article we will utilize DigitalOcean, but there's no reason other cloud providers like Google Cloud, AWS, or Azure couldn't be used instead. To get started, we need to create two more files in our repository which will keep track of packages. The Project.toml file should look like this:
[deps]
Pluto = "c3e4b0f8-55cb-11ea-2926-15256bba5781"
PlutoBindServer = "2fc8631c-6f24-4c5b-bca7-cbb509c42db4"
PlutoUtils = "a5ec66cb-57bb-4ae5-9259-3342d9ed6c94"
And the Manifest.toml file is much longer, so visit this article's repository for that file's contents. It's especially important that we copy these files exactly, because they specify the exact versions of both Pluto.jl and PlutoSliderServer.jl which needs to be included to make this project work.
Configuring DigitalOcean
This process is pretty standard, in that all we will do is make a virtual machine. Start by creating a droplet via the DigitalOcean dashboard or CLI. I made mine the lowest possible configuration, but I would recommend adjusting this based on your expected needs. For example, if you expect a large number of users to be simultaniously changing sliders on your website, I would suggest a higher VM configuration.
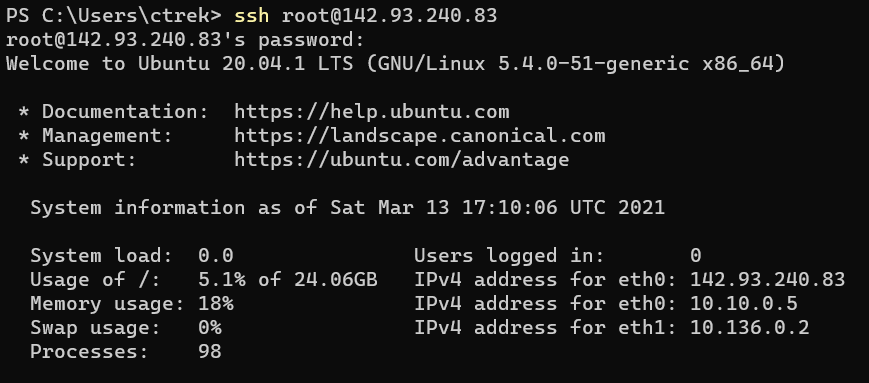
Now we must log into the virtual machine via SSH. This will depend on how you configure your droplet to begin with. For mine I set a root password, but I would suggest for real-world applications to use an SSH key instead.
Firstly, clone the GitHub repository created previously
git clone https://github.com/ctrekker/pluto-static-render-tutorial.gitWe will do more with this later, but for now we must install Julia. Without dealing with Aptitude or other package managers, we can install Julia regardless of Linux distro with only a couple simple steps. First download the latest Julia release from julialang.org with the following code:
wget https://julialang-s3.julialang.org/bin/linux/x64/1.6/julia-1.6.0-linux-x86_64.tar.gzThis is the link for downloading version 1.6.0, so it will change in the future. To obtain the latest link, visit julialang.org/downloads, copy the link for the "Generic Linux on x86", and replace the link above with the copied link.
Now we can extract this archive
tar -xvf julia-1.6.0-linux-x86_64.tar.gz -C ~This will extract Julia to ~/julia-1.6.0, where 1.6.0 is replaced with whatever version you choose to download. Now all that's left to install Julia is to add it to our PATH. I'll do this by adding a line to my .profile file, but there are several other ways that you could use.
Add this line to the end of your ~/.profile file:
export PATH="$PATH:/home/ctrekker/julia-1.6.0/bin"Now we can move on to running our PlutoSliderServer.jl. The process is still rather involved since the feature is still brand-new, but will hopefully get easier as time progresses. For the time being, the easiest way to set up PlutoBindServer.jl is as follows:
First open the Julia REPL and install PlutoBindServer.jl
(@v1.6) pkg> add https://github.com/JuliaPluto/PlutoSliderServer.jlThis will install the package locally. Next navigate to the directory where the notebooks you want to serve are. This is likely where the pluto-static-render-tutorial files were if you have followed the guide verbatim. Now we need to create two new files: one for server configuration and one for easily starting the server.
Firstly the server configuration, which I am calling PlutoDeployment.toml:
[SliderServer]
host = "0.0.0.0"
port = 2345

[Export]
slider_server_url = "https://yourwebsitegoeshere.com"
Be sure to replace the slider server URL with the domain (or IP) that will point to the Droplet. We set the host equal to 0.0.0.0, telling the HTTP server to respond to requests from anyone.
The next file I'll call start.jl which will contain instructions on how to start the server.
import PlutoSliderServer
PlutoSliderServer.run_directory("."; static_export=true, config_toml_path="./PlutoDeployment.toml")
The second line tells the slider server to run all the files in the current directory (recursively), to also export each notebook as a static HTML file, and to also grab additional configuration from the PlutoDeployment.toml file in the working directory.
At this point the slider server along with the static notebook files should be accessible publicly in a web browser on port 2345. However sliders will still not work since the connection must be secure (with HTTPS). Obtaining an SSL certificate is beyond the scope of this guide (see this one instead), but we will set up a reverse proxy using NGINX to make setting up SSL easier.
Install NGINX:
sudo apt install nginxModify /etc/nginx/sites-enabled/default to contain the following:
server {
    listen 80 default_server;
    listen [::]:80 default_server;

    location / {
        proxy_pass http://127.0.0.1:2345/;
        proxy_http_version 1.1;
        proxy_set_header Upgrade $http_upgrade;
        proxy_set_header Connection "Upgrade";
        proxy_set_header Host $host;
    }
}
And after restarting NGINX and obtaining SSL certificates your notebooks should be interactive! This process is anything but simple right now since the feature is still very new, but will certainly become easier to use in the future.
Final Words
The benefits of making your notebooks interactive online are innumerable and offers a whole host of new opportunities for educational writers, hobbyists, professionals, and everyone in between.
Unfortunately the process for doing so is rather intensive at this stage, so don't hesitate to reach out to myself (connor@plutojl.com) or the rest of the Pluto.jl team to ask for guidance at any step of the process! We love seeing people use these features and would gladly help out!