Making custom Pluto.jl interactive components! 🎈

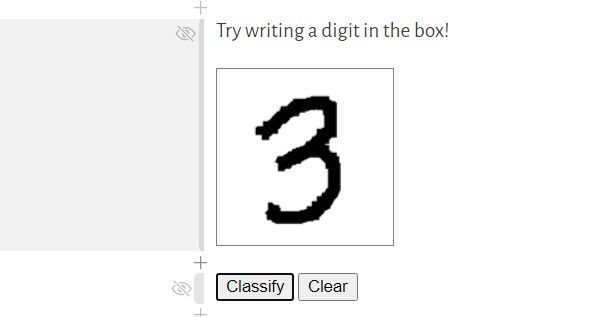
A month or so back I did a demonstration for a new feature in Pluto, and part of my presentation involved a basic Pluto notebook that would classify handwritten digits that you could draw directly into a Pluto notebook. One of the questions I got was "how do you make that custom drawing input"? I shared my notebook with those who asked, but it made me realize that very little documentation exists on how these parts of Pluto's front end actually works.
Today I'll guide you through the process for making your own custom Pluto components beyond just my drawing input, and hopefully that process will reveal just how flexible Pluto notebooks can be.
A Brief Summary of @bind
In case you've never used @bind (if not you're missing out), here's a short summary of what it does. If you have used it, feel free to skip over this section.
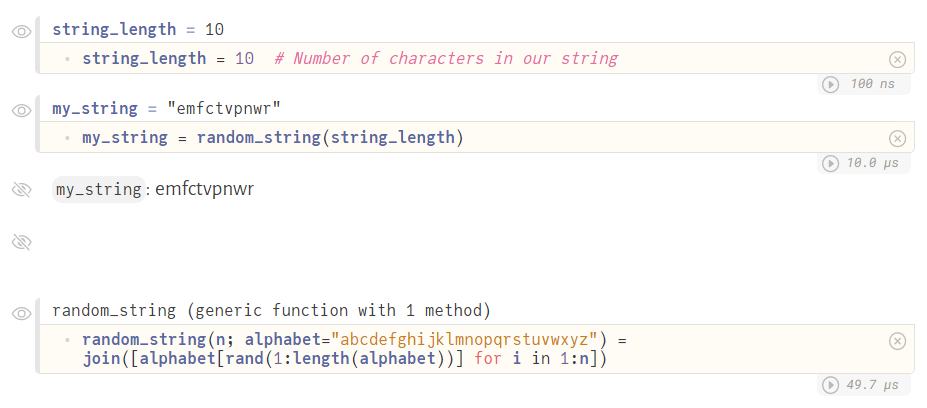
The @bind macro in Pluto takes in two arguments. The first is the name of the variable you want to assign, and the second is an HTML element that can yield a value. For example, say you want to assign a variable string_length that controls the length of some random string (called my_string). In typical Julia code that would look something like this:
random_string(n; alphabet="abcdefghijklmnopqrstuvwxyz") = join([alphabet[rand(1:length(alphabet))] for i in 1:n])

string_length = 10  # Number of characters in our string
my_string = random_string(string_length)
The definition for random_string just selects a random letter from an alphabet n times and joins those letters together to produce a random string. In Pluto each of these statements would be placed in a separate cell, depicted below.
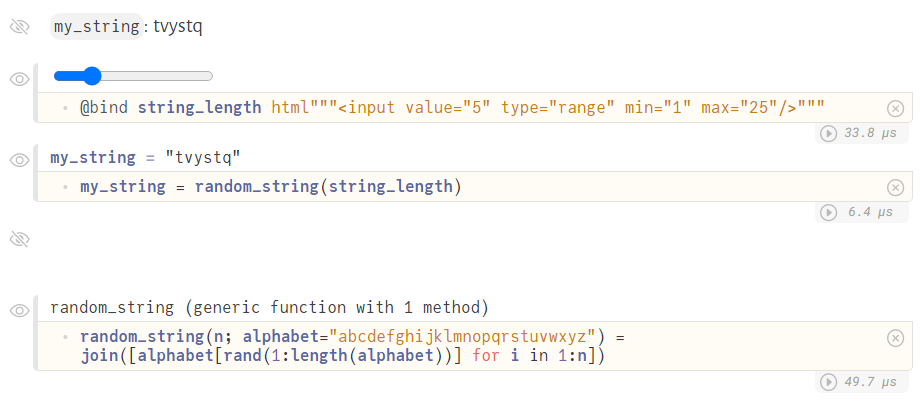
Now let's make use of @bind so that users can input their own string lengths with a slider. Instead of assigning string_length in the standard way, we will do so with @bind.
@bind string_length html"""<input value="5" type="range" min="1" max="25"/>"""On the left we @bind, in the middle we state that the variable we want to assign is string_length, and on the right we tell Pluto how that input should be received. In this case we will use an HTML input element with type range (a slider). We set it's default value to 5, its min (minimum) to 1, and its max (maximum) to 25. Here's what the notebook looks like now:
Dragging the slider around will change the contents and length of the string in realtime! If you've ever used widgets in Jupyter, @bind functions similarly. The key difference is that updates to @bind cause responses in other cells beyond just the cell containing @bind.
Making our own components
One of the nice things about @bind is that it works with all the HTML input elements out of the box. But not all user input can be handled with HTML inputs. For example the drawing input that I mentioned building earlier had to be custom-built. In this section I'll walk through exactly how to build a similar custom component that responds to the user's mouse being moved. The end goal is to have a component which looks like a box that the user can move their mouse around in and get an [x, y] coordinate pair in Julia representing the mouse positioning. Here's an image of the final result:
Overview
We saw in the previous section that fundamentally @bind just listens to changes in HTML input elements and puts their value in a Julia variable. But as it turns out, if we implement some extra logic, any HTML element can behave as if it's an element.
At a high level, all we will be doing is assigning a <div> element a value property in JavaScript, and artificially trigger an event called oninput which alerts @bind that a value has changed. As such much of the work in creating these components is not Julia, but rather JavaScript.
Basic Implementation
In the examples I will simply show the html""" <!-- html goes here --> """ part of the @bind statement, since the variable name will stay the same. To get started, create a Pluto cell with the following contents:
@bind my_custom_input html"""<div></div>"""The right-hand HTML string contains a single div element. For the time being it does nothing since we haven't implemented any logic for it yet. Now create a second cell which displays the value of my_custom_input. For me that looks like this:

We now clearly see that my_custom_input holds no value, which makes sense because div elements by default have an undefined value. But let's change that by adding some JavaScript inside the div tag.
html"""
<div id="my_custom_input_div">
    <script>
    	const mouseInput = document.getElementById("my_custom_input_div");
    </script>
</div>
"""
Now we have a script containing a line of JavaScript that will assign our div element to a variable. But still our @bind cell appears to have no output, so let's style the div to give it a box shape.
<div id="my_custom_input_div" style="width: 300px; height: 300px; border: 1px solid black"><!-- other content omitted --></div>Here's what our component now looks like:

It's nothing pretty but it will get the job done. The user can clearly see where the box starts and stops with the outline. Let's continue writing the script code now by giving the component a default value other than missing. I'll arbitrarily choose [0, 0].
<div id="my_custom_input_div" style="width: 300px; height: 300px; border: 1px solid black">
    <script>
    	const mouseInput = document.getElementById("my_custom_input_div");
        mouseInput.value = [0, 0];
    </script>
</div>
Simple! After rerunning the @bind cell we can now see the value of my_custom_input is now [0, 0]. The next step, which is once again relatively straighforward, is listening for mouse movement and setting the value of the div once more.
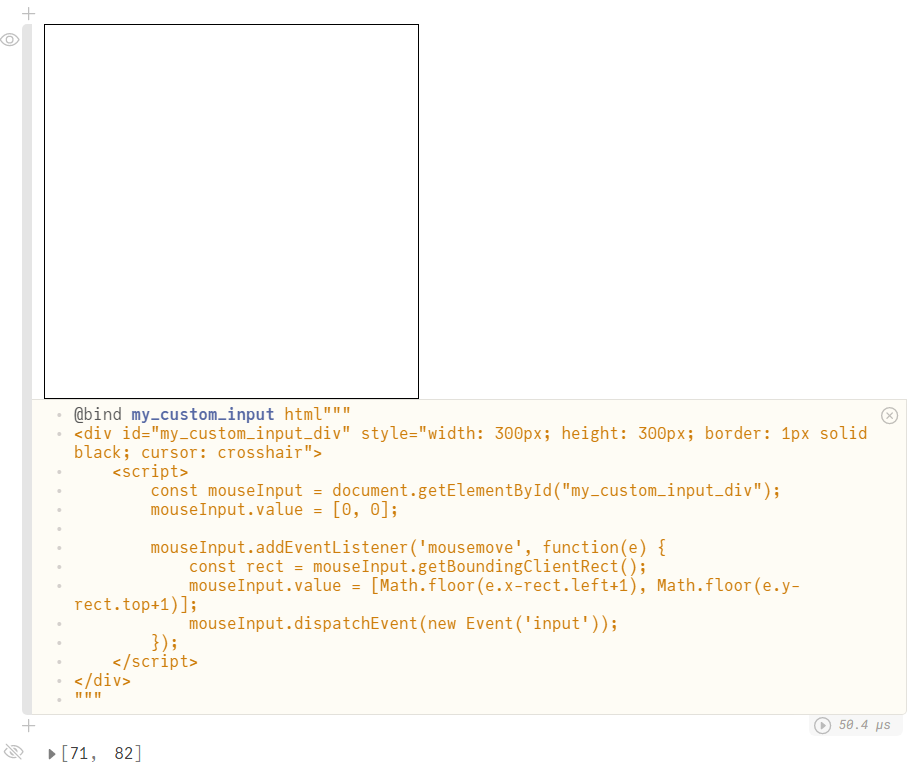
<div id="my_custom_input_div" style="width: 300px; height: 300px; border: 1px solid black">
<script>
const mouseInput = document.getElementById("my_custom_input_div");
mouseInput.value = [0, 0];
mouseInput.addEventListener('mousemove', function(e) {
mouseInput.value = [Math.floor(e.x), Math.floor(e.y)];
mouseInput.dispatchEvent(new Event('input'));
});
</script>
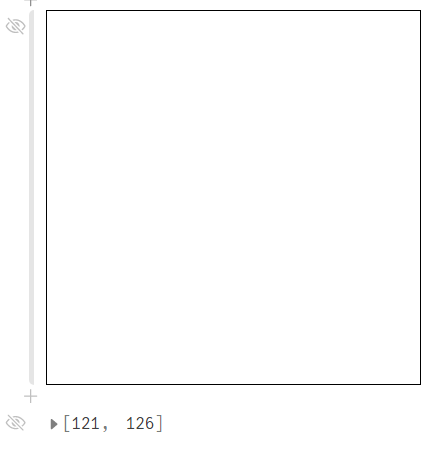
</div>Once again after rerunning the @bind cell you should now see the value of my_custom_input change whenever you move your mouse over the box! One very important thing to note is on line 8. In addition to setting the value of the mouseInput variable we also have to dispatch an event. Similar to how we listen to mousemove on line 6, Pluto listens to the input event for changes to an element's value. Since div elements aren't natural inputs in HTML, we have to trigger this ourselves on line 8.
You may notice moving your mouse around that the coordinates at the top left should equal [0, 0], but actually don't. This is because the coordinates are relative to the top left of the user's browser rather than the component. We'll have to use one more trick to fix this. I updated the mousemove event listener function's contents to the following:
const rect = mouseInput.getBoundingClientRect();
mouseInput.value = [Math.floor(e.x-rect.left+1), Math.floor(e.y-rect.top+1)];
mouseInput.dispatchEvent(new Event('input'));
On the first line we get the "bounding rectangle" on the page for our component. This calculates pixel values for the element's width, height, and position on the page. In our case we just subtract the element's distance from the left of the page from the coordinate value, and do the same for the y coordinate but from the top of the page. We add one pixel to each because of our component's 1px border.
And that's it! My final @bind statement looks like this:
At the bottom you can see the current position of my mouse (which unfortunately is invisible in screenshots), which is stored in the value of my_custom_input.
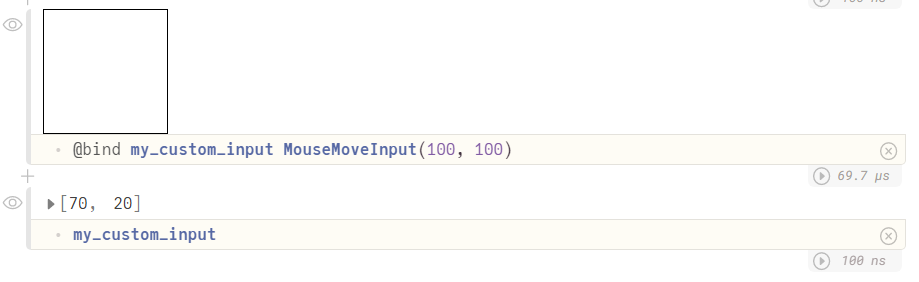
Using it more than once
If you only ever need to use a component once, then the above is just fine. But having to write out all that HTML every time you want to create one of those components would be a nightmare! Instead of doing that though, we can define the HTML as a Julia function and simply call that function in the @bind call. For example, @bind my_custom_input MouseMoveInput().
This approach comes with numerous benefits, such as being able to add in parameters to our component. What if we wanted to change the width and height? Just add in a function parameter!
Here's an example of what my implementation of MouseMoveInput looks like.
function MouseMoveInput(width=300, height=300)
	id = random_string(16)
	@htl("""
	<div id=$(id) style="width: $(width)px; height: $(height)px; border: 1px solid black">
		<script>
			const mouseInput = document.getElementById("$(id)");

			mouseInput.value = [0, 0];

			mouseInput.addEventListener('mousemove', function(e) {
				const rect = mouseInput.getBoundingClientRect();
				mouseInput.value = [Math.floor(e.x-rect.left+1), Math.floor(e.y-rect.top+1)];
				mouseInput.dispatchEvent(new Event('input'));
			});
		</script>
	</div>
	""")
end
You'll notice right off the bat that a couple differences are present. For one, we have to make a random string (random_string is defined in the @bind recap) and use that as a unique id for our div instead of using the same one over and over. HTML documents should never have more than one element with the same ID in it, and the getElementById function no longer works if there are.
Secondly I couldn't use the html""" """ syntax because I needed string interpolation (using $(<variable name>) in Julia to insert the random id into our HTML). This macro is exported from the HypertextLiteral package, so you'll have to install and import it into the Pluto notebook for this code to work.
Finally I added in two parameters which let you change the width and height of the box, in case 300x300 pixels is too large or small.
Final Notes
It's worth noting a couple of important things before sending you off to build your own custom @bind inputs.
If you want to take this even further and write even more complex components, know that you can also make use of Pluto's Preact frontend. Since Preact apps require no compilation step, you can write your components in React code for more complex state management and other advanced features. For our basic mouse movement component this would have been way overkill. But for custom dashboards or complex input elements, writing your component as a React component may be the best way to go.
Also, a package worth mentioning is PlutoUI, which if you haven't seen already, actually wraps many of the HTML input element types in functions similar to our MouseMoveInput. This can both save a lot of time and effort writing HTML as well as clean up your notebook code.
Conclusion
If you want to see other examples of custom @bind components, this talk at PlutoCon 2021 by Fons van der Plas gives a good overview of how JavaScript works inside Pluto. The stars really are the limit on this one. Literally anything you can make in HTML you can turn into an input element that Pluto @bind can listen to!